Efficient watering is essential for healthy gardens, especially during dry spells or in regions with limited rainfall. Setting up a drip irrigation system is one of the most effective ways to deliver water directly to plant roots, reducing waste and promoting robust growth. This guide explains how to install a drip irrigation system step by step, making it accessible for beginners and experienced gardeners alike.
Whether you’re growing vegetables, flowers, or shrubs, a well-designed drip setup saves time, conserves water, and helps prevent common issues like leaf diseases caused by overhead watering. Before diving into the installation process, it’s helpful to understand the basics and gather all necessary materials. If you’re new to gardening, you might also find value in learning about common mistakes in vegetable gardening to avoid setbacks and maximize your harvest.
Why Choose Drip Irrigation for Your Garden?
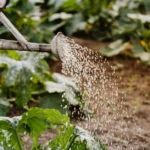
Drip irrigation offers several advantages over traditional watering methods. By delivering water slowly and directly to the base of each plant, it minimizes evaporation and runoff. This targeted approach helps maintain consistent soil moisture, which is crucial for plant health and productivity. Additional benefits include:
- Water efficiency: Reduces water usage by up to 50% compared to sprinklers.
- Healthier plants: Keeps foliage dry, lowering the risk of fungal diseases.
- Time savings: Automates watering, freeing up your schedule.
- Flexibility: Easily adapts to gardens of any size or shape.
For those interested in maximizing garden health, consider exploring the benefits of mulching garden beds as a complementary practice to drip irrigation.
Planning Your Drip Irrigation Layout
Before you begin, take time to plan your system. Assess your garden’s size, plant types, and water source location. Sketch a simple map of your beds or rows, noting where each plant is located. This will help you determine how much tubing, emitters, and connectors you’ll need.
Key considerations include:
- Water pressure: Most home systems work best at low pressure (15–30 psi). A pressure regulator may be necessary.
- Water source: Drip systems can connect to outdoor faucets, rain barrels, or dedicated irrigation lines.
- Plant spacing: Emitters should be placed close to the root zone of each plant.
- Expansion: Design your system with future growth in mind, allowing for easy additions.
For raised beds, a modular approach works well. If you’re considering upgrading your garden beds, check out options like a raised planter bed for improved drainage and organization.
Gathering Materials and Tools
To set up your drip irrigation, you’ll need the following supplies:
- Drip tubing (1/2-inch mainline and 1/4-inch feeder lines)
- Drip emitters or drippers (various flow rates)
- Connectors and tees
- End caps or figure-eight clamps
- Pressure regulator and filter (if needed)
- Timer (optional, for automation)
- Hole punch tool
- Stakes or holders for tubing
- Scissors or garden shears
Most hardware stores and garden centers carry drip irrigation kits that include many of these components. Kits are a convenient way to get started, especially for small to medium gardens.
Step-by-Step Guide to Setting Up Drip Irrigation
1. Connect to Your Water Source
Attach the pressure regulator and filter to your outdoor faucet or hose bib. These components protect your system from clogging and ensure the correct water pressure. If you plan to automate watering, install a timer at this stage.
2. Lay Out the Mainline Tubing
Unroll the 1/2-inch tubing and lay it along the rows or beds where you want to irrigate. Use stakes to secure the tubing in place, following the layout you planned earlier. Cut the tubing as needed and use connectors or tees to navigate corners or split lines.
3. Install Feeder Lines and Emitters
Using a hole punch, make small holes in the mainline tubing where each plant is located. Insert 1/4-inch feeder lines into these holes, and attach drip emitters to the end of each line. Choose emitter flow rates based on plant needs—vegetables and flowers often do well with 1-2 gallons per hour emitters.
For closely spaced plants, consider using dripline tubing with built-in emitters spaced every 6–12 inches. This is especially useful for raised beds or densely planted areas.
4. Cap the Ends and Test the System
Seal the ends of your tubing with end caps or figure-eight clamps. Turn on the water and check for leaks, blockages, or uneven flow. Adjust emitter placement and flow rates as needed to ensure every plant receives adequate moisture.
To monitor soil moisture and avoid overwatering, a soil moisture meter is a helpful tool for ongoing maintenance.
Tips for Maintaining Your Drip Irrigation Setup
Regular maintenance keeps your system running smoothly and extends its lifespan. Here are some practical tips:
- Check emitters and tubing for clogs or leaks every few weeks.
- Flush the system at the start and end of each season to remove debris.
- Adjust emitter placement as plants grow or as you rotate crops.
- Use a timer to automate watering and ensure consistency.
- Combine drip irrigation with mulch in your vegetable garden to further reduce evaporation and suppress weeds.
If you notice yellowing leaves or signs of overwatering, review your watering schedule and emitter flow rates. For more on diagnosing plant health, see why leaves turn yellow on plants.
Expanding and Customizing Your System
One of the strengths of drip irrigation is its flexibility. As your garden changes, you can easily add new lines, emitters, or even connect multiple beds. Modular kits make expansion straightforward, and many components are compatible across brands.
For gardeners interested in maximizing yields, consider integrating your drip system with other best practices, such as crop rotation and soil health monitoring. If you’re just starting out, resources like this beginner’s guide to starting a vegetable garden can help you plan your space and choose suitable crops.
Frequently Asked Questions
How much water does a drip irrigation system use compared to sprinklers?
Drip irrigation is significantly more water-efficient than traditional sprinklers. By delivering water directly to the soil at the base of each plant, it can reduce water usage by up to 50% or more, depending on your setup and local climate.
Can I install drip irrigation in an existing garden?
Yes, drip systems are highly adaptable and can be retrofitted to established gardens. Simply lay the tubing around your existing plants and insert emitters as needed. Raised beds, in-ground rows, and containers can all benefit from this method.
How do I prevent emitters from clogging?
To minimize clogs, always use a filter at the water source and flush the system regularly. If you use well water or a rain barrel, filtering is especially important. Periodically check emitters and clean or replace them as needed.
Should I use mulch with drip irrigation?
Absolutely. Mulching helps retain soil moisture, reduces weed growth, and protects the tubing from sun damage. Learn more about the best mulch for vegetable plants to pair with your irrigation system.
Installing a drip irrigation setup is a practical investment for any gardener. With careful planning and regular maintenance, you’ll enjoy healthier plants, lower water bills, and more free time to enjoy your outdoor space.