Thinning seedlings is a critical step for gardeners aiming to grow robust, productive plants. When seeds are sown close together, overcrowding can lead to weak growth, poor air circulation, and increased risk of disease. Learning how to thin seedlings properly ensures that each plant has the space and resources it needs to thrive, ultimately leading to a more bountiful and healthy harvest.
Many beginners are hesitant to remove young plants, fearing it will reduce their yield. In reality, strategic thinning is one of the most effective ways to promote strong root systems, vigorous growth, and better yields. Whether you’re starting vegetables indoors or directly in your garden beds, understanding the right timing and technique for thinning can make all the difference.
Before diving into the step-by-step process, it’s helpful to review some seed starting tips for beginners to avoid common mistakes and set your seedlings up for success from the start.
Why Thinning Seedlings Is Essential
Overcrowded seedlings compete for light, water, and nutrients. Without enough space, plants become leggy, weak, and more susceptible to pests and diseases. Thinning allows the strongest seedlings to flourish, resulting in sturdier plants and higher yields. This simple practice is especially important for root crops like carrots and beets, where proper spacing directly affects the size and quality of the harvest.
By removing excess seedlings, you also improve airflow around the plants, reducing the risk of fungal diseases. Well-spaced plants are easier to water and fertilize, and their roots have the room they need to develop fully.
When to Start Thinning Seedlings
The best time to thin depends on the type of vegetable and how densely you sowed your seeds. Generally, you should begin thinning when seedlings have developed their first set of true leaves (the second set of leaves to appear, after the initial seed leaves or cotyledons). At this stage, the plants are strong enough to handle the process, but not so large that their roots are tangled together.
For some fast-growing crops, thinning may need to happen sooner. Always check the seed packet for recommended spacing and timing, as different vegetables have different requirements. If you’re unsure, err on the side of thinning a bit earlier rather than waiting too long.
Step-by-Step Guide to Thinning Seedlings
Properly thinning seedlings is straightforward, but a gentle touch is important to avoid disturbing the roots of the remaining plants. Here’s how to approach the process:
- Identify the strongest seedlings: Look for healthy, upright plants with thick stems and vibrant leaves. These are the ones you want to keep.
- Check recommended spacing: Refer to your seed packet or a reliable resource for the ideal distance between mature plants. This will guide how many seedlings to remove.
- Remove excess seedlings: Use small scissors or snips to cut unwanted seedlings at the soil line. This method is less disruptive than pulling them out, which can disturb neighboring roots.
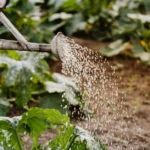
- Water gently: After thinning, water the area to help remaining seedlings recover from any minor disturbance.
- Repeat if necessary: Some crops benefit from thinning in stages. If you’re unsure, thin to half the final spacing first, then thin again once plants grow larger.
For more details on preparing your soil and ensuring optimal conditions for young plants, you may want to read about how to adjust soil pH for vegetables.
Tips for Thinning Different Types of Seedlings
Not all vegetables require the same approach. Here are some specific tips for common crops:
- Root vegetables (carrots, beets, radishes): These need ample space to develop properly. Thin early and avoid disturbing the roots of those you wish to keep.
- Leafy greens (lettuce, spinach): These can often be thinned gradually, harvesting the smallest plants for salads as you go.
- Brassicas (cabbage, broccoli): Thin to the strongest seedling per cell or spot, as these need room for their large leaves and heads.
- Direct-sown vs. started indoors: Thinning is especially important for direct-sown crops, but even seedlings started in trays may need thinning if multiple seeds germinate in one cell.
Common Mistakes to Avoid When Thinning Seedlings
Even experienced gardeners can make missteps during this process. Here are a few pitfalls to watch out for:
- Waiting too long: Delaying thinning can result in tangled roots and stressed plants.
- Pulling instead of snipping: Uprooting seedlings can disturb the roots of those you want to keep. Use scissors for a cleaner cut.
- Not thinning enough: It’s tempting to leave extra seedlings “just in case,” but overcrowding will reduce your overall harvest quality.
- Ignoring plant health: Always keep the healthiest, most vigorous seedlings, even if they’re not perfectly spaced.
If you’re starting seeds indoors, choosing the best seed starting mix for vegetables can also make thinning easier and promote strong early growth.
What to Do With Thinned Seedlings
Many thinned seedlings, especially leafy greens and herbs, can be used as microgreens in salads or sandwiches. If you’re careful, some can even be transplanted to fill gaps elsewhere in your garden. However, avoid transplanting root crops, as their delicate roots are easily damaged.
Composting is another excellent way to recycle thinned seedlings and return nutrients to your soil. Just make sure any diseased plants are discarded rather than composted.
Ensuring Continued Success After Thinning
After thinning, monitor your seedlings closely for signs of stress or wilting. Water gently and provide adequate light. As plants grow, keep an eye on spacing and thin again if necessary. For guidance on moving seedlings to their final location, see these tips on how to transplant seedlings safely without causing root shock.
Good garden planning, including proper thinning, is key to maximizing your harvest. For more advice on layout and starting your first vegetable plot, check out this beginner’s guide to starting a vegetable garden.
Frequently Asked Questions
How do I know which seedlings to keep?
Choose the healthiest, most vigorous seedlings with strong stems and well-developed leaves. Remove any that appear weak, spindly, or discolored. Prioritize even spacing based on the mature size of the crop.
Can I transplant thinned seedlings to another spot?
Some seedlings, such as lettuce or herbs, can be carefully transplanted if their roots are not too disturbed. However, root crops like carrots and beets do not transplant well and are best thinned and used as microgreens or composted.
Is it necessary to thin all types of vegetables?
Most direct-sown vegetables benefit from thinning, especially root crops and leafy greens. Some plants started in individual cells may not need thinning if only one seed is sown per cell. Always check the recommendations for your specific crop.
What happens if I don’t thin my seedlings?
Overcrowded seedlings will compete for resources, leading to weak, spindly growth and smaller yields. They are also more susceptible to disease and may not develop properly, especially in the case of root vegetables.
Should I fertilize after thinning?
It’s often a good idea to provide a gentle feeding after thinning, especially if your soil is low in nutrients. Use a diluted, balanced fertilizer and water well to help remaining seedlings recover and continue growing strongly.