Efficient watering is one of the most important factors in keeping a home garden healthy and productive. Drip irrigation for home gardens offers a simple, water-saving solution that delivers moisture directly to plant roots with minimal waste. For beginners, setting up a drip system may seem intimidating, but with the right information and a few basic supplies, anyone can install and maintain a system that keeps vegetables, flowers, and herbs thriving.
This guide covers the essentials of drip irrigation, including how it works, the benefits for home gardeners, the main components you’ll need, and step-by-step instructions for getting started. You’ll also find practical tips for troubleshooting, maintenance, and maximizing your garden’s results. If you’re also interested in optimizing your soil, check out how to adjust soil pH for vegetables for additional guidance on creating the perfect growing environment.
What Is Drip Irrigation and How Does It Work?
Drip irrigation is a method of watering plants by slowly releasing water directly to the soil at the base of each plant. Unlike overhead sprinklers, which spray water over a large area, drip systems use a network of tubing, emitters, and connectors to deliver water exactly where it’s needed. This targeted approach reduces evaporation, minimizes runoff, and ensures that plant roots receive consistent moisture.
Most home garden drip systems are low-pressure and easy to assemble. Water flows from a main supply line through small tubes, with emitters or drippers spaced along the tubing to control the flow rate. The result is a steady, gentle supply of water that keeps soil moist without over-saturating or causing erosion.
Key Benefits of Drip Irrigation for Home Gardeners
There are several reasons why drip irrigation for home gardens has become so popular among gardeners of all experience levels:
- Water Efficiency: Drip systems use up to 50% less water than traditional sprinklers by delivering moisture directly to the root zone.
- Healthier Plants: Consistent soil moisture reduces plant stress and helps prevent diseases caused by wet foliage.
- Reduced Weeds: By watering only where needed, drip irrigation discourages weed growth between rows and in paths.
- Time Savings: Automated systems can be set on timers, freeing up time for other gardening tasks.
- Flexibility: Drip lines can be easily adjusted or expanded as your garden changes from season to season.
For those just starting out, the simplicity and adaptability of these systems make them a smart investment for both small raised beds and larger plots. If you’re new to vegetable gardening, the University of Maryland Extension offers a helpful resource on how to start a vegetable garden that pairs well with drip irrigation techniques.
Essential Components of a Drip System
Setting up a basic drip system requires only a few main parts, most of which are available at garden centers or online. Here’s what you’ll need:
- Mainline Tubing: Flexible hose (usually 1/2 inch) that carries water from the source to the garden beds.
- Emitters or Drippers: Small devices that regulate the flow of water to each plant or group of plants.
- Connectors and Fittings: Tees, elbows, and couplers that allow you to route tubing around corners and obstacles.
- Filter: Prevents debris from clogging emitters and keeps the system running smoothly.
- Pressure Regulator: Reduces water pressure to a safe level for drip components (usually 10–30 psi).
- End Caps or Plugs: Seal the ends of tubing runs to prevent leaks.
- Optional Timer: Automates watering schedules for convenience and consistency.
Many manufacturers offer starter kits that include all the basics for a small garden. As your confidence grows, you can expand the system to cover more beds or add specialized emitters for different plant types.

Step-by-Step Setup for Your Drip Irrigation System
Installing a drip system in your home garden is a straightforward process. Here’s a basic outline to help you get started:
- Plan Your Layout: Sketch your garden beds and decide where you want to run main lines and branch lines. Mark the locations of plants that will need emitters.
- Connect to Water Source: Attach the mainline tubing to your outdoor faucet or rain barrel. Install a filter and pressure regulator as needed.
- Lay Out Tubing: Run the mainline tubing along the rows or perimeter of your beds. Use stakes to secure it in place.
- Install Emitters: Punch holes in the tubing at each plant location and insert emitters. For closely spaced plants, use drip tape or soaker lines.
- Seal the Ends: Close off the end of each tubing run with end caps or plugs to prevent leaks.
- Test the System: Turn on the water and check for leaks, clogs, or uneven watering. Adjust emitter placement as needed.
- Set a Schedule: If using a timer, program it for early morning or late evening watering to reduce evaporation.
For best results, monitor soil moisture regularly. A soil moisture meter can help you fine-tune your watering schedule and avoid over- or under-watering. For more tips on soil health, see our article on how to test soil at home.

Maintenance and Troubleshooting Tips
Keeping your drip system running smoothly requires occasional maintenance. Here are some practical tips:
- Check for Clogs: Inspect emitters and filters regularly, especially if you use well water or have hard water. Clean or replace clogged parts as needed.
- Monitor for Leaks: Look for wet spots or drops in pressure that could indicate leaks in tubing or connectors.
- Flush the System: At the start and end of each season, flush the lines with clean water to remove sediment and debris.
- Adjust for Plant Growth: Move or add emitters as your garden layout changes or as plants mature.
- Winterize: In cold climates, disconnect and drain the system before freezing temperatures arrive to prevent damage.
Regular checks and simple fixes will keep your drip irrigation system efficient and reliable year after year. For more advice on optimizing your garden, you might also find our article on how to thin seedlings properly helpful as your plants grow.
Maximizing Results with Drip Irrigation
To get the most from your investment in drip irrigation for home gardens, consider these best practices:
- Mulch Around Plants: Adding a layer of mulch helps retain soil moisture and further reduces evaporation.
- Group Plants by Water Needs: Arrange your beds so that plants with similar moisture requirements are watered together.
- Monitor Soil Health: Healthy, well-amended soil absorbs and retains water more effectively. Learn how to improve soil fertility naturally for better results.
- Adjust Seasonally: Change your watering schedule as the weather shifts or as plants mature and require less frequent watering.
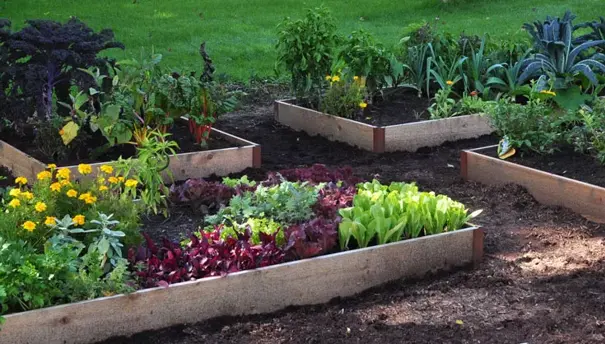
Drip systems are especially effective in raised beds and container gardens, where precise moisture control is critical. If you’re considering building new beds, a raised planter can make installation even easier and help you maintain optimal soil conditions.
Frequently Asked Questions
How often should I run my drip irrigation system?
The ideal watering frequency depends on your climate, soil type, and the plants you’re growing. As a general rule, run the system long enough to moisten the root zone (usually 30–60 minutes), then allow the soil to dry slightly before watering again. Use a soil moisture meter to fine-tune your schedule.
Can I use drip irrigation for container gardens?
Yes, drip systems are excellent for containers and hanging baskets. Use micro-tubing and small emitters to deliver water directly to each pot. Adjust the flow rate as needed for different plant types.
What should I do if my emitters get clogged?
Clogged emitters are a common issue, especially if your water source contains sediment. Remove and soak emitters in vinegar or clean water to dissolve mineral buildup. Installing a filter at the water source helps prevent future clogs.
Is drip irrigation suitable for all types of plants?
Most vegetables, herbs, and flowers benefit from drip watering. However, plants that prefer dry conditions, such as succulents, may need less frequent watering or a different setup. Always group plants with similar water needs together for best results.