Successfully moving seedlings from the comfort of your home or greenhouse to the unpredictable outdoors is a crucial step in gardening. Many new gardeners overlook the importance of acclimating young plants, but this process—known as hardening off—can make the difference between thriving transplants and stressed, stunted growth. Learning how to harden off plants before transplanting helps ensure your seedlings adapt to sunlight, wind, and fluctuating temperatures, reducing transplant shock and setting the stage for a productive garden.
This article will walk you through the essential steps, timing, and tips for gradually introducing your seedlings to outdoor conditions. If you’re also interested in optimizing your garden layout, you might find the advice in how to space vegetable plants correctly helpful as you plan your next move.
Why Hardening Off Seedlings Matters
Seedlings started indoors or in greenhouses are shielded from the elements. They enjoy stable temperatures, filtered light, and little wind. When suddenly exposed to direct sun, chilly nights, or gusty breezes, these tender plants can wilt, burn, or even die. Hardening off is the process of gradually exposing seedlings to outdoor conditions, toughening them up so they can survive and thrive in your garden beds or containers.
Skipping this step can result in:
- Sunscald or leaf burn from intense sunlight
- Wilting or stunted growth due to wind stress
- Shock from sudden temperature swings
- Increased vulnerability to pests and diseases
By taking the time to acclimate your plants, you give them the best chance to establish strong roots and healthy foliage once transplanted.
When to Start the Hardening Off Process
Timing is key. Begin the hardening off process about 7–10 days before you plan to transplant your seedlings outdoors. Make sure:
- All danger of frost has passed for your region
- Daytime temperatures are consistently above 50°F (10°C)
- Seedlings have at least two sets of true leaves and are sturdy
For a more detailed overview of seedling readiness, check out these seed starting tips for beginners to avoid common mistakes early on.
Step-by-Step Guide to Hardening Off Plants
Follow these steps to gradually introduce your seedlings to outdoor life:
- Choose a sheltered spot: Start by placing seedlings in a shaded, wind-protected area outdoors for 1–2 hours. Avoid direct sunlight at first.
- Increase exposure gradually: Each day, add 1–2 hours of outdoor time and slowly introduce more sunlight. After a few days, move them into dappled sun, then partial sun, and finally full sun if appropriate for the plant type.
- Monitor moisture: Outdoor conditions dry out soil faster. Check moisture levels frequently and water as needed. Using a soil moisture meter can help prevent both under- and over-watering.
- Protect from wind and cold: If strong winds or unexpected cold snaps are forecast, bring seedlings back inside or cover them with a lightweight fabric or cloche.
- Leave out overnight: After 5–7 days, if nighttime temperatures are mild, leave seedlings out overnight. This is the final test before transplanting.
Common Mistakes to Avoid When Acclimating Seedlings
Even with the best intentions, gardeners sometimes make mistakes during this transition. Here are some pitfalls to watch out for:
- Moving too quickly: Rushing the process can cause stress and damage. Stick to a gradual schedule.
- Ignoring weather conditions: Avoid exposing seedlings to strong winds, heavy rain, or sudden cold snaps.
- Forgetting to water: Outdoor air dries soil faster. Check pots and trays daily.
- Transplanting during midday heat: Move seedlings to their final spot in the early morning or late afternoon to minimize stress.
For more on minimizing transplant shock, read about how to transplant seedlings safely for best results.
Tips for a Smooth Transition to the Garden
Once your seedlings are fully acclimated, it’s time to move them to their permanent home. Here are some tips to ensure a successful transplant:
- Prepare the soil: Loosen and amend the soil in your garden bed or container before planting. For guidance on soil preparation, see this best seed starting mix for vegetables guide.
- Water before and after: Water seedlings thoroughly before transplanting and again after planting to help roots settle in.
- Plant at the right depth: Follow recommendations for each plant type. For a handy reference, check out how deep to plant vegetable seeds.
- Mulch and protect: Add a layer of mulch to retain moisture and shield young plants from temperature swings.
Additional Resources for New Gardeners
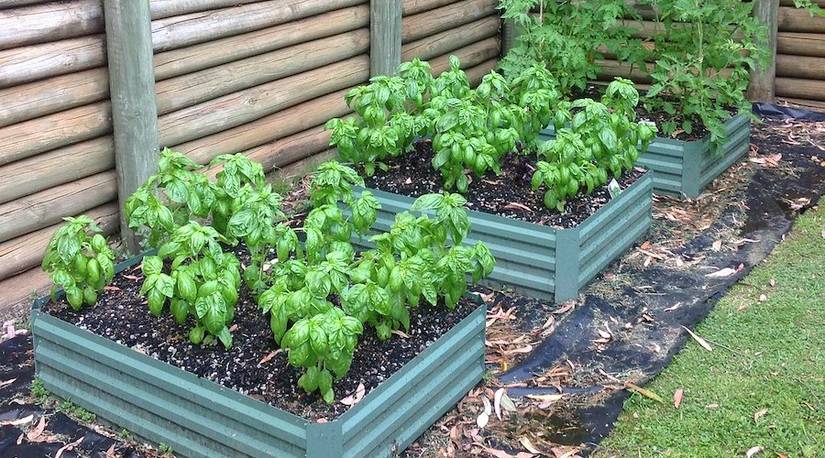
If you’re just getting started with vegetable gardening, you’ll find a wealth of practical advice in this beginner’s vegetable gardening guide. It covers everything from planning your garden to ongoing care throughout the season.
Frequently Asked Questions
How long does it take to harden off seedlings?
The process typically takes 7 to 10 days. Start with short periods outdoors in shade and gradually increase exposure to sunlight and outdoor conditions each day. By the end of the week, seedlings should be able to handle full days and mild nights outside.
What happens if I skip hardening off?
Seedlings that aren’t acclimated can suffer from sunburn, wilting, stunted growth, or even death. They may also be more susceptible to pests and diseases. Taking the time to harden off helps ensure a smooth transition and healthier plants.
Can I harden off plants in rainy or windy weather?
It’s best to avoid exposing young seedlings to harsh weather. If rain or strong wind is expected, keep seedlings indoors or in a protected area. Resume the process when conditions improve, or use covers to shield plants as needed.
Is hardening off necessary for all plants?
Most vegetables, herbs, and flowers started indoors benefit from acclimation. Some hardy crops may tolerate direct transplanting, but most will establish better if gradually introduced to outdoor conditions.
Conclusion
Taking the time to acclimate your seedlings is a simple but vital step in gardening success. By gradually exposing your plants to the outdoors, you help them develop resilience and reduce the risk of transplant shock. Remember to monitor weather, water consistently, and be patient. With these steps, your garden will be off to a strong, healthy start.