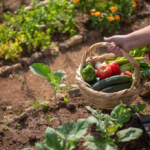
Fresh, homegrown sprouts are a nutritious addition to any meal, and cultivating them inside your home is simple, affordable, and rewarding. Whether you’re looking to boost your diet with living foods or want a gardening project that thrives regardless of the season, learning how to grow sprouts indoors is a practical skill for anyone interested in self-sufficiency and healthy eating. This guide covers the essentials for successful indoor sprouting, from choosing seeds to harvesting and storage, so you can enjoy crisp, flavorful greens all year long.
Sprouting doesn’t require a garden or even a balcony—just a few basic supplies and a little attention. If you’re new to homesteading or want to expand your indoor gardening skills, you’ll find that sprouting is one of the easiest ways to produce fresh food at home. For those interested in broader homesteading topics, you might also find value in our modern homesteading fencing guide, which offers practical tips for securing your outdoor spaces.
Benefits of Indoor Sprouting
Growing sprouts inside offers several advantages. First, it allows for a steady supply of fresh greens, even during winter or in small living spaces. Sprouts are packed with vitamins, minerals, and enzymes, making them a powerhouse addition to salads, sandwiches, and smoothies. Because the process is quick—most varieties are ready in less than a week—you can enjoy a continuous harvest with minimal effort.
Indoor sprouting is also cost-effective. A small amount of seed produces a large yield, and you don’t need expensive equipment. For those practicing sustainable living or urban homesteading, sprouting is an excellent way to supplement your diet with homegrown produce, regardless of climate or available outdoor space.
Essential Supplies for Sprouting at Home
Before you begin, gather the basic materials needed for sprouting. Here’s what you’ll need:
- Sprouting seeds: Choose seeds labeled specifically for sprouting, such as alfalfa, broccoli, mung bean, radish, or lentil.
- Sprouting container: Options include glass jars with mesh lids, specialized sprouting trays, or even fabric grow bags. Each method has its pros and cons, but all are suitable for indoor use.
- Water: Clean, filtered water is best for rinsing and soaking seeds.
- Light source: Most sprouts don’t require direct sunlight, but a bright kitchen counter or a spot near a window works well. For consistent results, especially in darker months, consider using LED grow lights to ensure healthy growth.
Choosing the Best Seeds for Indoor Sprouts
Not all seeds are created equal when it comes to sprouting. Always purchase seeds labeled for sprouting or microgreens, as these are tested for food safety and germination rates. Popular choices include:
- Alfalfa: Mild flavor, great for salads and sandwiches.
- Broccoli: Slightly spicy, rich in sulforaphane.
- Mung bean: Crunchy and sweet, ideal for stir-fries.
- Radish: Peppery flavor, adds a kick to dishes.
- Lentil: Earthy taste, high in protein.
Mixing different seeds can create interesting flavor combinations and boost nutritional value. Always store seeds in a cool, dry place to maintain freshness.
Step-by-Step Guide to Growing Sprouts Indoors
Mastering how to grow sprouts indoors is straightforward. Follow these steps for a successful harvest:
- Measure and rinse: Start with 1–2 tablespoons of seeds. Rinse thoroughly under cool water to remove dust and debris.
- Soak: Place seeds in your chosen container and cover with water. Soak for 6–12 hours, depending on the seed type.
- Drain and rinse: After soaking, drain the water completely. Rinse seeds with fresh water and drain again. This helps prevent mold and encourages healthy sprouting.
- Sprout: Place the container in a spot with indirect light. Rinse and drain seeds 2–3 times daily. Within a few days, you’ll notice tiny shoots emerging.
- Harvest: Most sprouts are ready in 3–7 days, depending on the variety. Once they reach the desired length, give them a final rinse and allow them to drain well.
- Store: Transfer sprouts to a covered container and refrigerate. Use within a week for best freshness.
Tips for Healthy and Safe Indoor Sprouts
To ensure your sprouts are both healthy and safe to eat, follow these best practices:
- Use clean equipment: Wash all containers and utensils thoroughly before use.
- Rinse regularly: Consistent rinsing prevents mold and bacterial growth.
- Monitor temperature: Sprouts thrive at room temperature (65–75°F). Avoid placing them near heat sources or in direct sunlight.
- Check for spoilage: Discard any sprouts that smell off, feel slimy, or show signs of mold.
- Harvest promptly: Overgrown sprouts can become bitter or tough. Harvest when they’re young and tender.
For those interested in expanding their homesteading skills, exploring modern homesteading herbal garden ideas can complement your indoor gardening efforts.
Creative Ways to Use Homegrown Sprouts
Sprouts are versatile and can be enjoyed in many dishes. Here are a few ideas to incorporate them into your meals:
- Salads: Add a handful of fresh sprouts for extra crunch and nutrition.
- Sandwiches and wraps: Layer sprouts with your favorite fillings for a fresh bite.
- Stir-fries: Toss mung bean or lentil sprouts into hot dishes just before serving.
- Soups: Use as a garnish for a burst of flavor and texture.
- Smoothies: Blend mild sprouts like alfalfa into green smoothies for a nutrient boost.

Common Challenges and Troubleshooting
While sprouting is generally easy, a few issues can arise. Here’s how to address common problems:
- Mold or foul odor: Usually caused by inadequate drainage or infrequent rinsing. Make sure to drain thoroughly and rinse at least twice daily.
- Poor germination: Old or improperly stored seeds may not sprout well. Always use fresh, high-quality seeds.
- Yellow or pale sprouts: Lack of light can result in pale growth. Move your container to a brighter spot or use supplemental lighting.
- Seed clumping: Gently shake or stir seeds after rinsing to separate them and promote even growth.
For those just starting with self-sufficiency, reviewing key homesteading principles for beginners can provide a helpful foundation for your home food production journey.
Frequently Asked Questions
What are the easiest seeds to sprout indoors?
Some of the simplest and most reliable seeds for indoor sprouting include alfalfa, mung bean, lentil, and radish. These varieties germinate quickly and require minimal care, making them ideal for beginners.
How do I prevent mold when growing sprouts inside?
To avoid mold, rinse your seeds thoroughly 2–3 times per day and ensure all water drains completely after each rinse. Use clean containers and avoid overcrowding seeds in your sprouting vessel.
Can I grow sprouts indoors without sunlight?
Yes, most sprouts do not need direct sunlight. A bright kitchen counter or a spot with indirect light is usually sufficient. For consistent results, especially in winter, using LED grow lights can help maintain healthy growth.
How long do homegrown sprouts last in the refrigerator?
Once harvested and properly drained, most sprouts will keep fresh in the refrigerator for up to one week. Store them in a covered container and use them promptly for the best flavor and texture.