Embracing a homestead lifestyle on a 15-acre property presents a unique opportunity to become self-sufficient. One crucial aspect of this lifestyle is mastering the art of canning. With the right canning tips, your 15-acre homestead can flourish, providing year-round sustenance and reducing reliance on store-bought goods. Let’s explore how you can maximize your homestead’s potential with effective canning strategies.

Why Canning is Essential for Homesteaders
Canning is a vital skill for homesteaders, serving as a means to preserve the bounty of each harvest. By understanding and implementing key canning techniques, you can ensure that your fruits, vegetables, and even meats are stored safely and deliciously. This not only extends the life of your produce but also supports a sustainable lifestyle.
Understanding the Basics of Canning
Before diving into the specifics, it’s essential to grasp the basics of canning. There are two main methods: water bath canning and pressure canning. Each method is suited for different types of food, and understanding their differences is crucial for safety and effectiveness.
Water Bath Canning
This method is ideal for high-acid foods such as fruits, jams, and pickles. The high acidity helps to prevent bacterial growth, making it a straightforward and safe canning process.
Pressure Canning
Pressure canning is necessary for low-acid foods like vegetables, meats, and poultry. This method uses higher temperatures to eliminate bacteria, ensuring the food remains safe for consumption.
Essential Equipment for Canning
Having the right equipment is vital for successful canning. Key tools include:
- Canning jars and lids
- Jar lifter
- Canning funnel
- Ladle
- Pressure canner or water bath canner
Investing in high-quality equipment will not only make the process smoother but will also ensure the longevity and safety of your canned goods.
Preparing Your Produce
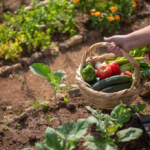
Proper preparation is key to successful canning. Ensure that your produce is fresh, ripe, and free from blemishes. Washing and trimming are essential steps to remove any dirt or debris. For optimal flavor and preservation, consider blanching vegetables before canning.
Step-by-Step Canning Process
Let’s walk through a basic canning process to get you started:
1. Sterilize Your Jars
Begin by sterilizing your jars in boiling water to eliminate any bacteria. This step is crucial for ensuring the safety of your canned goods.
2. Prepare the Food
Whether you’re making jam or canning beans, ensure your food is prepared according to the recipe. This might involve cooking, chopping, or seasoning your ingredients.
3. Fill the Jars
Using a canning funnel, fill each jar with your prepared food, leaving the appropriate headspace as indicated in your recipe.
4. Seal and Process
Place lids on the jars and secure them with rings. Process the jars in either a water bath or pressure canner, depending on the food type.
5. Cool and Store
Once processed, allow the jars to cool. Check seals before storing in a cool, dark place, such as a pantry.
Safety Tips for Canning
Safety is paramount in canning. Here are some tips to ensure your efforts are safe and effective:
- Always follow tested recipes from reliable sources.
- Ensure lids seal properly before storing.
- Label jars with the date and contents.
- Store jars in a cool, dark place.
Common Mistakes to Avoid
Avoid these common pitfalls to ensure your canning success:
- Using old or damaged lids that may not seal.
- Skipping the step of sterilizing jars.
- Ignoring headspace requirements, which can affect sealing.
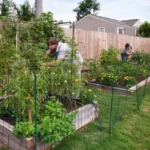
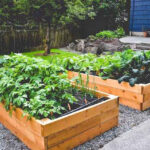
Maximizing Your 15-Acre Homestead’s Bounty
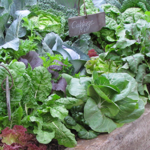
With effective canning, your 15-acre homestead can thrive, providing you with a variety of preserved foods year-round. Consider dedicating a portion of your property to growing high-yield crops that are ideal for canning, such as tomatoes, beans, and berries.
Long-Term Benefits of Canning
Beyond immediate food preservation, canning offers long-term benefits for homesteaders. It reduces food waste, saves money, and provides a sense of accomplishment and security in your self-sufficient lifestyle.
Integrating Canning with Other Homestead Activities
Canning can be seamlessly integrated into other homestead activities. For instance, after a day of [freezer planning](https://15acrehomestead.com/freezer-planning-15-acre-homestead/), you can use the surplus for canning. Additionally, an afternoon spent in the [indoor workshop](https://15acrehomestead.com/indoor-workshop-15-acre-homestead/) could be the perfect time to build custom shelves for your canned goods.
Sharing the Bounty
Canned goods make excellent gifts and can be a source of income. Consider selling your products at local farmers’ markets or online. This not only shares your bounty but also fosters community connections.
Embracing the Homestead Lifestyle
Canning is more than just a preservation method; it’s a way to embrace a self-sufficient and sustainable lifestyle. By incorporating these canning tips on your 15-acre homestead, you can enjoy the fruits of your labor year-round.
Additional Resources
For further guidance on homesteading and canning, consider visiting [15 Acre Homestead](https://15acrehomestead.com/) for more insights and tips.

FAQs
What is the best way to start canning on a homestead?
Begin with simple recipes and gradually expand to more complex ones. Focus on mastering the basics before experimenting with advanced techniques.
How can I ensure my canned goods are safe?
Follow tested recipes, sterilize your equipment, and check seals on jars before storing them.
What are the advantages of canning over freezing?
Canning offers a longer shelf life without the need for electricity, making it ideal for off-grid living and emergency preparedness.